Wednesday, July 13, 2011

Inspiration Abounds

My mom and I joke that hubby is going to take the internet away from me. Almost every day I see some beautiful, creative, or inventive idea that I just have to try. And then poor hubby has to listen for hours to the wonderfulness of this new project, on top of all the other projects I want to do.....I tend to overwhelm him with my excitement!

But anyway, when we first got married, I went cheap in our bedroom. Wal-mart Better Homes and Gardens collection the whole way, topped by an ancient rug my parents gave us to help keep the room a little warmer in the winter. A mere year and a half later.....not thrilled with the cheap curtains and bedspread anymore.

After seeing my updated hamper, I felt like the rest of the room looks pretty out of place. And I realized that I want our room to be a retreat for both of us, a place that's purely us, and the current look isn't cutting it. So I'm making small changes, while getting inspiration for the big things like bedding. I thought I'd share a few of the incredibly inspiring looks I've found so far!


So don't you totally love some of those?! I can't wait until our room looks like that! Enjoy!

Thursday, July 7, 2011

Kitchen Overhaul

We're slowly remodeling our house, which pretty much hasn't been updated since the 1970's. Unfortuately, since it's such a big project, the kitchen is going to be one of the last rooms we get to. But I've decided to make the best out of what we have. Why can't functional also be fun and pretty?

So I've been working on some kitchen projects for awhile, but I also spent two days this week taking everything out of the cabinets and completely rearranging them. It's hard getting used to where things are, but it is so much more effencient! Love it!

But I wanted to show you a couple of my projects. Or rather, I guess it's two projects in one. It all started with this:


Glorious, huh? And don't you love the picture of my little helper in the reflection? Anyway, this delightful find came from a little antique store for five dollars. Oh yes, just $5. And you can't tell here very well, but this thing is big. I looked for a long time for the perfect ovel frame to make into a chalkboard, and this is it. The mirror is in really bad shape, so I didn't feel guilty about taking the whole thing apart. Here's the frame after I hubby took out the mirror.


The frame really wasn't in bad shape when I got it, just some chipping paint, so originally I just kept it how it was. Hubby cut a piece of leftover wall panelling for me to put in it, and I gave that about a million a couple coats of chalkboard paint. I didn't get a picture of it like that, but after a couple months living with it, I just needed more color. Lately, I've been completely obsessed with color! So, I found a paint color I like and got a sample size of it at Lowe's. I was pretty sure it would be too much just painted on solid, so I put it on lightly and rubbed some off as I went. Then I took a little white paint and did the same thing very lightly over the pink. I didn't get a close-up shot, but it has a soft, kind of aged look.


And there it is on the wall in the kitchen. Needs more, doesn't it?

I've been so inspired by the many gallery walls made of empty frames that are floating around the web. So when my mom said she had a box of frames that used to have family pictures in them, I jumped on it! She was kind enough to let me take my pick and paint them.


These frames are all at least 20 years old, and the varnish on them had dried out, so it took an insane number of coats of craft paint! Even a coat of primer on a couple of them didn't help. But I finally got there!

Usually I just eyeball it when hanging things, but I knew hubby would be pretty unhappy if I put extra holes in the walls he worked so hard to fix up awhile back, so I laid all the frames out on the floor to get the layout right.


And there it is! It isn't entirely done yet, I want to mount some antique items in the frames, but it's starting to look good!


I'm linking up at the party over at Remodelaholic this week! Go check out some of the other awesome projects!

Monday, July 4, 2011

Happy Birthday, America!

I hope everyone has the best 4th of July! Enjoy this day of family and fun, and remember what it took to earn the freedom we enjoy every day.


All we have of freedom, all we use or know -
This our fathers bought for us long and long ago.
-Rudyard Kipling, The Old Issue, 1899

Saturday, July 2, 2011

A Kitchen Chair Update

Years ago, before I got married, even before I met hubby, when I was preparing to move out on my own for the first time, my parents bought me a cute vintage dining room table with 4 chairs. Ok, so I use the term "cute" loosely here. The general shape and frame of the pieces is cute. The pattern on the table and the slippery, discolored vinyl chair seats and backs....much closer to hideous.


I've been meaning to recover the chairs forever. In fact, I think I promised by husband I would recover them when we first moved the table and chairs in a year and a half ago. I was finally inspired by my new tablecloth to go look at fabric, and Jo-Ann's didn't disappoint!


Love the stripes! I decided to just do the 2 chairs we always keep out first. The other two are stored for when we have company, and I think I want to do them in a different fabric, anyway, so it looks a little eclectic. We'll see!

I did the seats first, because they are super easy and I knew what I was doing there! I had a little helper for the first part, but as soon as the fabric was laid out on the floor for cutting, she had to go somewhere else :)


So I unscrewed the seat from the frame and laid it out on the floor on top of the fabric. I left the fabric folded over so I could cut the seat for both chairs at the same time. 'Cause I'm a little lazy like that. Also, I don't measure often. That will come into play later :)

I laid the first piece of fabric face-down on the floor, and put the seat face-down on top of it. Then just used the staple gun to attach the edges of the fabric on the bottom of the seat, making sure it was pulled tight, but not too tight.


The bottom doesn't look too pretty, but if anyone goes as far as looking underneath my chairs to see how well I did, well, I guess they deserve to see the truth! This looks a little nicer.


Oh, and I didn't think on the first one to mark, or even pay attention to where the screw holes were. So I had to search under the fabric on the seat bottom to look for them. And even then I was lazy and just pushed the screws into the fabric a little to mark the holes. I know, I just can't be trusted to anything!

So I got the seats done, and then the hard part began. I mostly made it hard by trying to take the easy way. I thought that instead of pulling out the sewing machine for the back covers, I'd just use my handy iron-on adhesive. And I wanted to make them so the covers could be removed easily for cleaning. I thought I might just put Velcro on where they would close on the bottom. And I thought I could just fold over the fabric when I did that and wouldn't have to hem the bottom. So, I cut the fabric to size (as one piece for each chair, so I could just fold it over at the top) and used the iron-on adhesive to "hem" the sides. Then I could slide the cover down over the seat back like a pillowcase. That part worked fine.

But when it came to the bottom, it did not work out. My Velcro didn't stick well enough to hold the fabric together, and there was only barely enough fabric for it to meet on the bottom (because, remember, I don't measure! Please don't be like me). It was just a mess. So, I broke down and hemmed the bottoms, and stitched a piece of ribbon inside the front and back of each side of each cover, so they tie.


Didn't turn out quite like I thought, but I actually love them. And they are so much better than before! Here's the whole picture:


I've said it before, but I have got to work on my photography skills, because these pictures just don't do my projects justice! But you get the idea!

Have a wonderful holiday weekend, and don't forget all the sacrifices our forefathers had to make so that we can be free.

Monday, June 27, 2011

Thankful Thoughts

Last week, a friend of mine posted on Facebook about how, rather than complaining about all the things she wishes were different about her house, she wanted to share the things she loved about it. I love that thought! I have a tendency to be a little negative and I'm always thinking about the next thing I want to get for or change about the house. So, in honor of being a little more thankful, here's a list of the things I love most about our house!

1. Its our first place together, the house we can drive by years from now and point out to our kids and tell them that's where our family started out.

2. The wonderful man and adorable doggy I get to share it with!

3. It isn't your typical 1950's ranch, where you come into the living room or kitchen and the other rooms are all off a straight hallway. It has some fun character and history.

4. Speaking of history, I love that it was built in 1954. That's one of my favorite time frames to decorate from, so it is perfect for me!

5. I also love this cool story that my husband heard from a guy he works with. Apparently, the guy grew up right near our house and he told hubby the house was originally built down the street, and was moved to this lot in 1954! His mom used to practice photography outside, and I guess he has pictures somewhere of the house in the original location. I would love to see those!

6. The entire house needs updated and remodeled, which may sound like a bad thing at first. But that just means we get to redo the whole place without feeling bad about replacing mostly new things. And we can make it totally ours!
7. We have a strong, sturdy house that keeps us cozy and protected. So many people don't have anywhere near as much as we do. God has truly blessed us!

8. Our house has plenty of space for the two of us, and enough for when we have a family later on. It isn't huge, but we'll never have to move because we run out of space. Unless we have ten kids or something. Oh, heaven forbid :)
9. I have my own *huge* laundry room. I hate doing laundry in a public facility, and it is a blessing to me not to have to cart it anywhere or deal with other people while doing it. And like I said, the room is massive, so that's a bonus!

10. Most of our rooms get tons of wonderful sunlight. I love natural light and usually throw open all the blinds and curtains first thing in the morning. Nothing makes me happier than a comfortable morning with sun streaming in the windows!

So there's the top ten things I love about our house! Take a few minutes to look around and be thankful for your home today!

Thursday, June 23, 2011

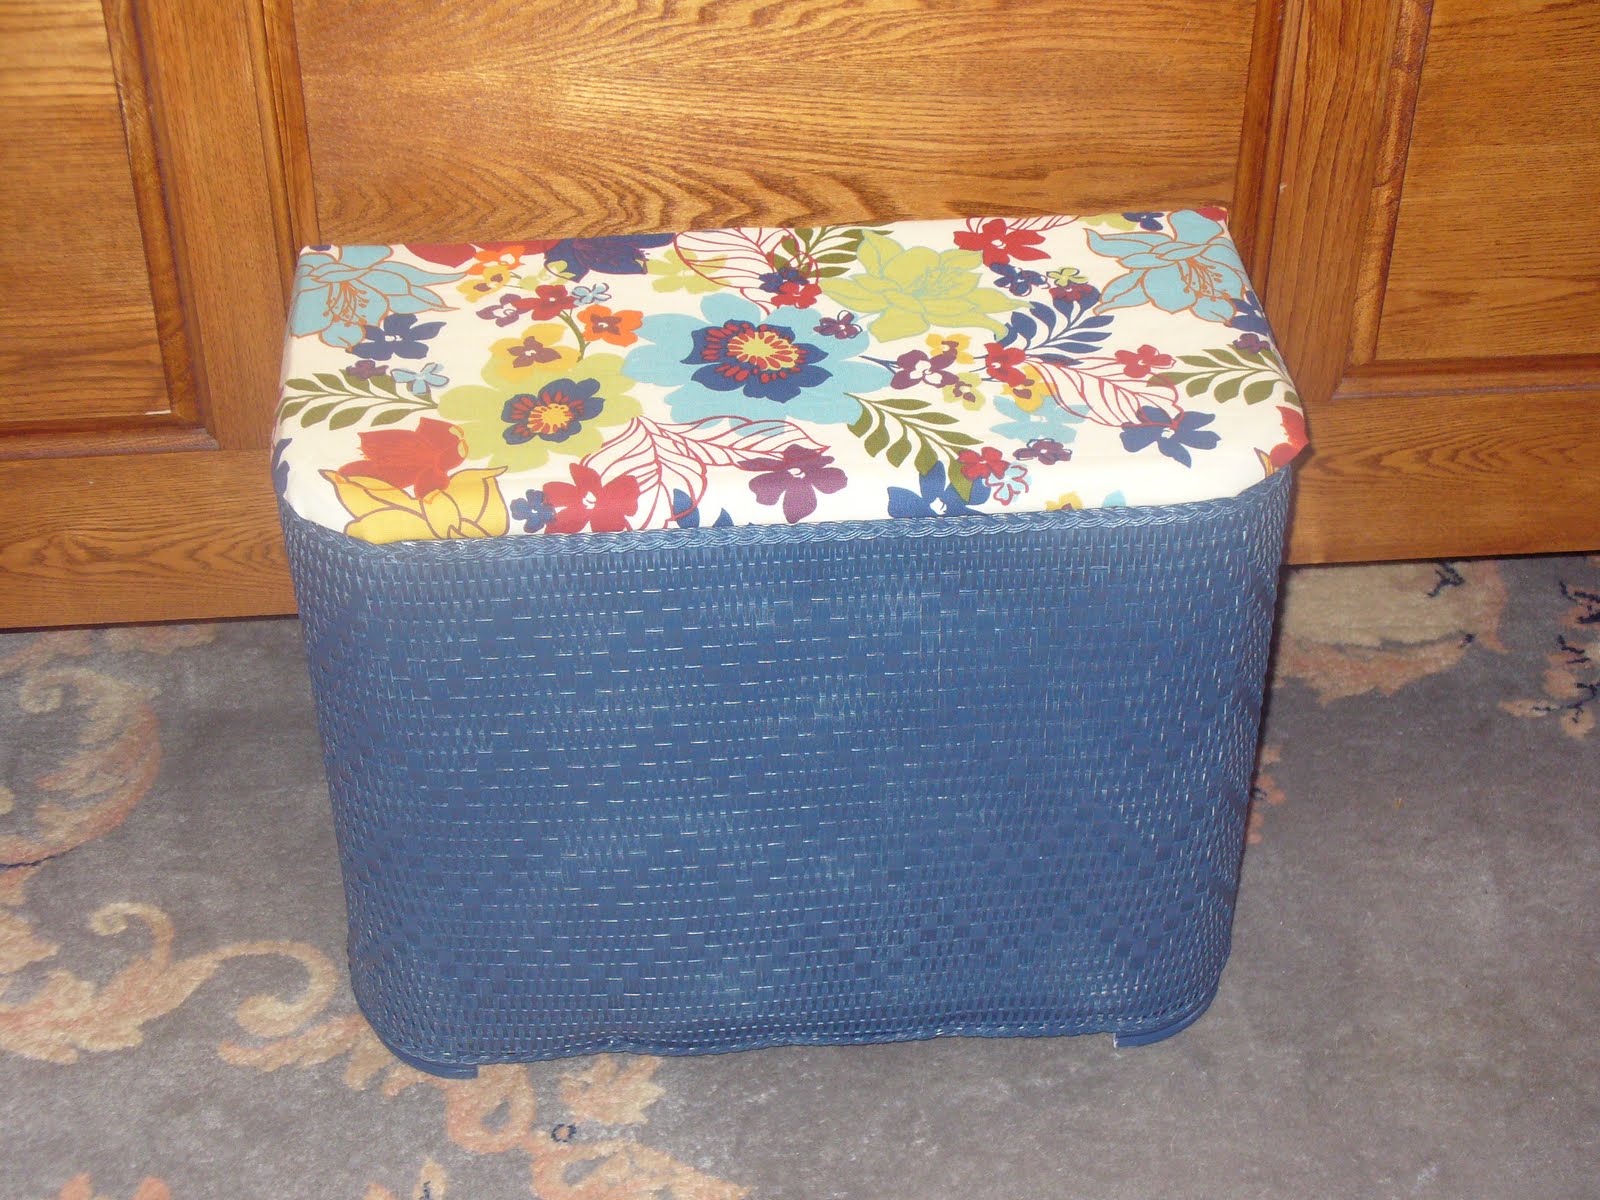
My Favorite.....80's Hamper?!

First....if you look at the last post, its been a really long time since I posted. As in, months. The good news is, lots of good, big decisions have been made and lots of changes are in place and life is great! And, I'm back with some fun projects!

This is now one of my very favorite things in our house. Want to see it?
Oh yeah, that's some pretty 80's tackiness :) And all those shoes on the floor? They are the reason for this whole project. I HATED looking at those shoes lined up every day! So, my mom and I stopped in at our favorite junk antique store and she convinced me this is perfect for the job. Want a closer look at that fabulous fabric on the lid?


Wow, I honestly haven't seen any of those little prairie people in a LONG time! But, a little spray paint and some fabric can make a world of difference!


Ta-da! The picture doesn't quite do it justice. The blue is just beautiful! And best of all, the shoes are blessedly hidden. This thing makes our whole bedroom look kind of shabby! But never fear, I'm mulling over a make-over for the rest of the room soon, too :)

Keep checking in for more great projects!


I'm linking this up over at Remodelaholic! Go check some of the other awesome projects there!


P.S. I forgot to add the best part! The hamper was marked for $5, but when I got to the register, it came up to just $3.50! I got the fabric, which I want to cover my entire house in, at Jo-Ann Fabric for somewhere around $4 (1/2 yard). I went to Lowe's and picked out that great dark blue spray paint, then happened to walk by their little spot for returned paint and saw an almost full can of the same color for $1! So the whole thing was only $8.50!

Monday, January 3, 2011

Happy 2011!

I hope everyone had a wonderful holiday season! We had some great time with family and a whole week off together, which was tons of fun.

I usually don't enjoy New Year's Day very much. After all the other holiday fun, it had always been a little bit of a let-down for me. But this year, hubby and I spent the day cleaning out, organizing, and rearranging things in the house. I love those types of projects, so it was actually the best New Year's Day I've ever had!

Here's my favorite project from the day. I not only have a junk drawer in the kitchen, but the cabinet above it is also full of junk! A couple months ago, I spent some time cleaning it out and arranging it, but in no time at all, it was back to this:


Ugh! It may not look too bad from far away, but believe me, this was craziness! So we made a trip to Dollar Tree, and I found these:


I probably wouldn't have chosen pastels, but for a buck a piece, I'm not going to complain!


Here's the finished product! Well, almost finished. I'm planning to make labels to put on each box, and I may go get another one to put all my candles in, just to make it look that much neater :)